Harcon Dry Hip System Installation Guide
Stage 1.
To preparefor dry hip installation felt and batten the roof in the normal manner, ensuring that the tiles battens are securely fixed to the hip rafter or to noggins fixed to the side of the hip rafter.
 Stage 2.
Two 25mm tile battens screwed (screws not supplied) through to the hip rafter in between the tile battens. Ensure that supports have been installed at the apex and at the eaves and regularly between the tile battens down the line of the hip.
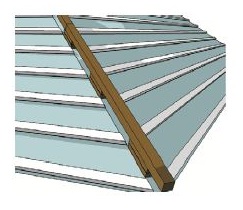
 Stage 3.
Fix the 50mm x 50mm hip battens down to the support using screwa (not supplied).
If two 25mm x 50mm tiling battend are used to build the hip batten then ensure that they are properly fixed together.
 Stage 4.
Tile as normal ensuring tiles are neatly cut along the line of the hip batten and ensuring no cut tile edges are further than 30mm from the hip batten.
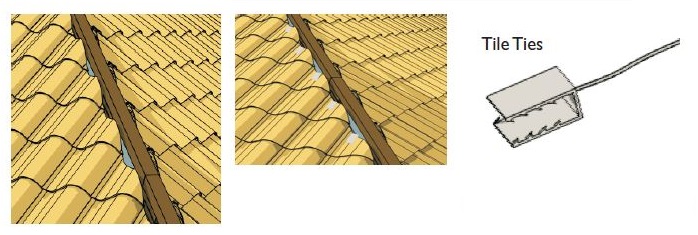
All small cut tiles should be well secured and checked before proceeding with dry hip installation.
Small tile cuts can be secured using tile ties provided. The clips are pushed on to the cut side of the tile and the wire tail secured to the tiling batten or the hip batten.
All cut tiles must be checked to ensure positioning before continuing with the installation.
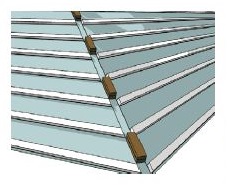
 Stage 5.
Take the hip roll and unroll from the eaves ensuring it is centrally positioned over the hip batten leaving 100mm extra at the top to cover the hip ridge apex.
Secure the hip roll in position using well spaced felt nails.

Avoid stretching the roll at any point during the installation. Where it is necessary to use more than one hip roll ensure the joints are overlapped by 100mm to enable water to drain from the roof.
Ensure all raking tiles are clean and dry before removing backing tape from the underside of the roll. Once the backing tape is removed push the hip roll firmly into the tiles either side of the hip batten. The roll should finish central over the hip batten and provide a continuous seal along the tiles.
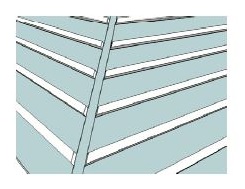
Stage 6.
The hip support trays should be fitted from the bottom of the hip up. The first tray should be cut to suit the angle and overhang of the tiles at the eaves.
Nail the tray to the hip batten using fixing provided ensuring it is centrally located on the batten. Fix further trays on the hip ensuring that a 100mm lap is made on the tray below.
To enalbe two hips to meet at the ridge the trays should be mitred at the internal angle.
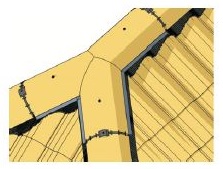
 Stage 7.
Fix the block end hip tile using the screw and sealing washer supplied. Ensure that the fixing passes through the support tray and secures tightly into the hip batten to achieve a firm seal between the tile and fixing.
 Stage 8.
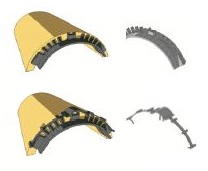
The union clamps provided should be fitted centrally on the hip tiles. The base should be formed to the underside of the tile. The cap should be pushed securely into the base with both tiles properly located before fixing through with screw provided.
 Stage 9.
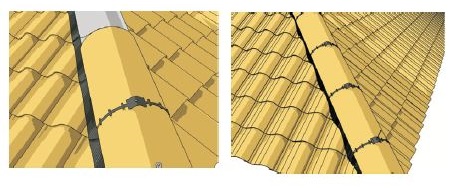
Securely attach and fix the unions with each hip tile whilst working eaves to ridge. Ensure all tiles are properly secured and properly aligned.
When constructing the ridge consider that a full length hip tile must be used at the apex with any adjustment for the hip length to be made by trimming the adjacent hip tiles.
Once complete check all union clamps are securely screwed to the hip batten. The hip tiles should sit evenly on the support tray. The top apex hip and ridge tiles should be mitred to give a neat finish and set aside.
 Stage 10.
An apex soaker shaped and trimmed to fit should be fitted to ensure a weather tight installation at the hip / ridge apex. (not supplied)
Fix the apex / ridge tile by drilling a 6mm diameter hole approximately 125mm down from the apex using a masonary drill and secure through the tile to the batten using a screw and sealing washer provided.